Showing posts with label Freebie. Show all posts

Thursday, July 6, 2017

What Do You Know?

We give our incoming Kinders a screening in the spring to get a little glimpse of what they know & to make dividing them into classes a little easier. But, while it is helpful for making up the class lists, the spring screening doesn't give me an up-to-date picture of just what my little newbies know. I wanted a quick way to check on some key skills as early in the school year as possible. Because beginning of the year kindergarten is so calm and orderly crazy and hectic, I created a set of quick checks that were quick & easy to do. Really, each quick check only takes a minute or two per student & can be done while the other kiddos are working independently. (Stuff like playdoh, manipulatives, coloring ~ simple activities that will keep them engaged for a little while.) If you are lucky enough to have an aide enlist her to  help! Our teaching assistant is super fast & gets so much done while I am working with the rest of the kids. This year I will have a student teacher from day one. Guess what she is going to help me do! 
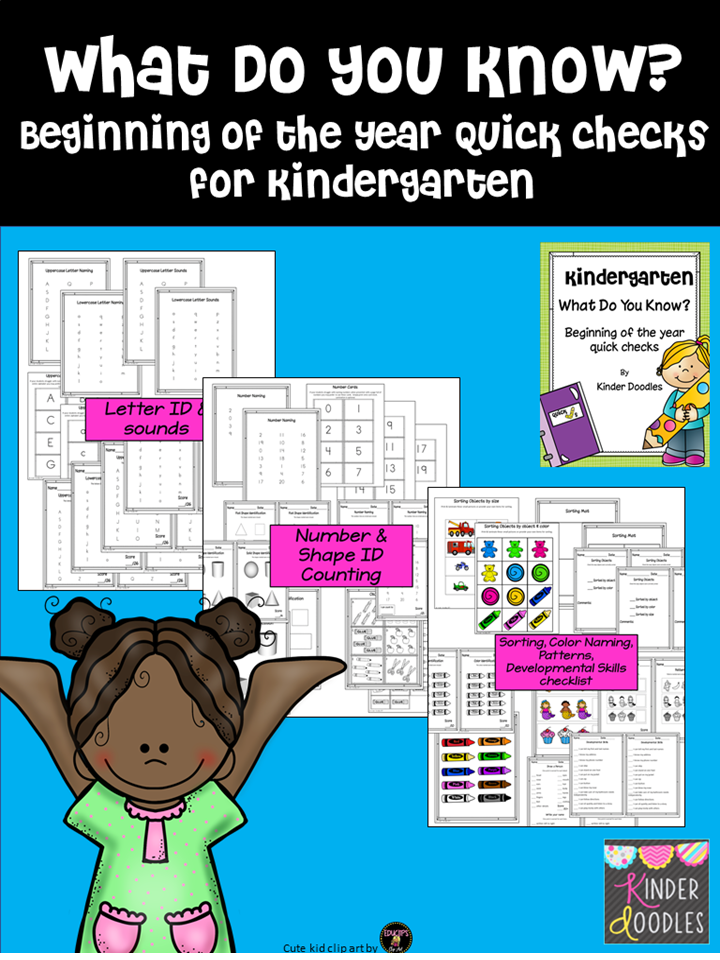

Because incoming Kinders are all over the place as far as exposure and what they can do I like to  do some simple checks after the first few days of school. We are still getting to know each other & naming colors, drawing a person, and sorting are usually pretty low-stress for the students. They generally are able to fly through these checks. The only things I laminated were the pages with color because I wanted to protect my "toner investment" ~ everything else is printed onto card stock or regular copy paper.


I like to keep a check list of the students' developmental skills. Most of the time they are right on target, but it gives good data if you need to seek RtI for anyone.


Pick whichever format works best for you ~ pages or cards. Some children are easily overwhelmed by a page full of numbers, so looking at one card at a time might help them to be successful ~ or at least a little less nervous. 


If you want to see how high they can count you can write it in the corner of the top record sheets. Once I've heard a kid count to 100 a couple of times, I declare them able to count to 100, so I like to  keep track of how high they can count. Time saver at the end of the year!


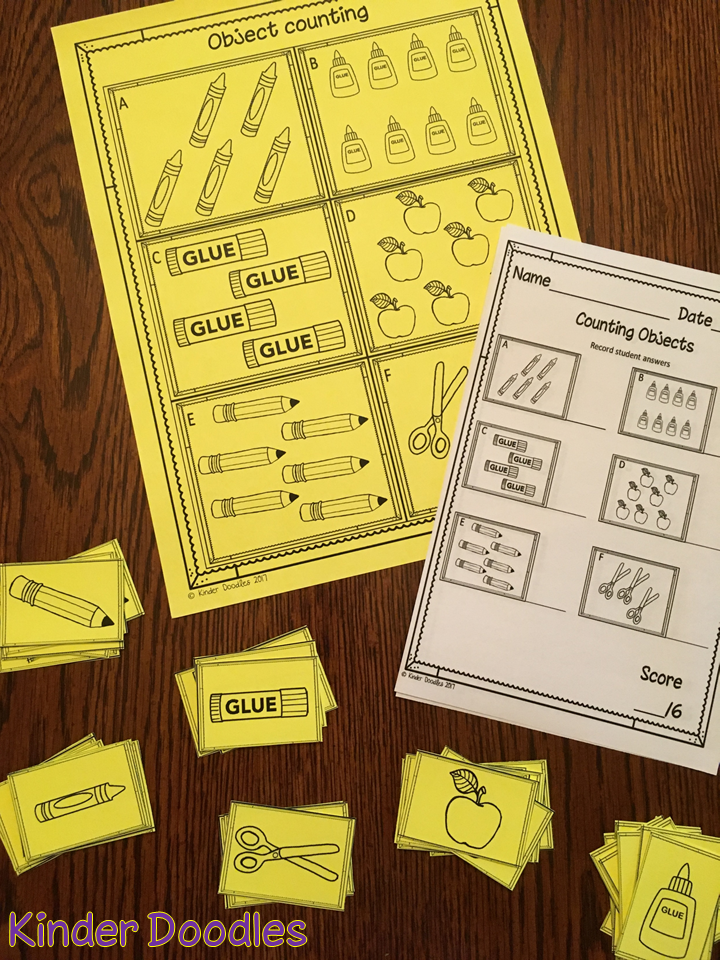
Use the page as is, cut apart for cards, or give your students little picture cards to count. 

I do check the kids on solid shapes just to see if anyone know what they are. I usually get one or two who know some of the 3D shapes. **Even though my set includes a picture page for solid shapes I usually use actual solid shapes.


Some kids know all their letters, and others, well not so much. Like counting to 100, once a student has correctly named all the uppercase & lowercase letters I declare that they know all of them. As the year goes on & the skills get harder it saves time when testing my kiddos if I don't have to listen to everyone name letters.


If you find that your students get overwhelmed by a sheet full of letters, you can use these letter cards. The cards are also great for a quick review ~ keep them handy & pull them out to review with all of your students, a small group, or one little cutie.


Technically you could use the same pages from above, but I like to have a separate set for each skill. When I'm ready to do a quick check it's handy to be able to grab everything I need. 


Each quick check is clipped together as a set, making your life easier! Be sure to attach a master copy of each record sheet. That way if you need to progress monitor students you can quickly make some more sheets as needed. 


I happened to have this Rubbermaid storage container. (I tried to find a link to purchase it, but couldn't. Maybe it's no longer available. This container from Sterilite might be a good alternative.) Anyway, I have this container that fits all of the quick check materials AND, my clipboard. It's sooo difficult (at least for me) to keep everything organized at the beginning of the year ~ and maybe later in the year... Knowing that everything I need for BOY quick checks is all in one place makes me happy. 


When I'm ready to check my kids on their skills, I grab the materials from my bin and get started. This data sheet is included with my set. The name fields are editable, but I couldn't figure out how to rotate the editable fields for the top part. Maybe it's not possible (does anyone know if you can rotate editable fields with Adobe?) 


Get this editable student record sheet when you subscribe to my newsletter! Click HERE to get it now.


Wednesday, February 24, 2016

I Like Tape!

...because it is sticky!

My Kinder team and I use the wonderful Guiding Readers set by DeeDee Wills & Deanna Jump. Click HERE to purchase. If you haven't tried it, you should. Our PTO purchased it for us because we were so disappointed by our adopted series.  We love it! Anyway, enough advertising...

One of the components of a recent lesson on long a included writing a sentence using a word in a sentence. I took a picture of some of my favorites.


You may be wondering why some of the sentences are marked up. They are examples of some of the editing we do. Last summer I got to attend a two day Kristina Smekens literacy retreat. In one sessions she explained how to use color coding to help kids to edit their own writing. I picked three things that I felt were appropriate for Kinders to focus on while writing: spaces between words, capital letter at the beginning, and ending punctuation. We do work on other things, but I figured three skills were enough for my little Kinders. I do think that they are doing a great job! 

I created a freebie set using the color coding edits you can get HERE. I purchased a pack of kid sunglasses at Party City & popped out the lenses. The kids have fun wearing them as they edit. 

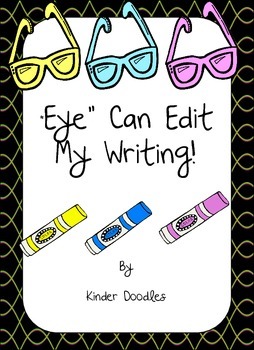
"Eye" Can Edit My Writing Poster set


Friday, October 23, 2015

Five for (Fall Break) Friday

I love a beautiful October day! And, if it happens to include a day of Fall Break it's even better! October in northwest Indiana is very pretty. The leaves are amazing right now. In honor of this colorful season my Five for Friday features all things fall.

fiveforfriday2_thumb[3]


My kinders worked hard on making numbers to five in various ways using my Apple Basket Number Sense activities. To round out the lessons we made these cute apple baskets to add some fall color to our room (and, to show off their learning of course).


My set includes 42 pages of number sense activities that are perfect for this time of year.
 Purchase it HERE. (PS you can get just the craftivity for free in my store.)


Beautiful autumn leaves. To create some lovely leaves for our hallway tree we had fun sponge painting these papers. I had traced a leaf shape on the back before painting. The kids cut them out once the paint had dried. Because the sponge painting was random they were surprised to see the results. They will stay up until Thanksgiving ~ by then we will need to make some snow for the tree!


Scrappy Owls have come to roost in our tree branches. We made these cuties using my freebie and some left over scrapbook paper I found in the hall. (When we teachers come in to set up for the up-coming year anything that is no longer wanted/needed it put out into the hall with a "Free to a Good Home" sign. I scored a stack of pretty paper from the cast-off pile!) I think the kids did a great job ~ each owl is so cute and unique. 


 Get this craftivity HERE. Please rate it if you download it. And, if your kids make them I'd LOVE to see them. Post a link in the comments or send pictures to via Facebook.


Hedgehogs! I wanted to do something different this year on our hallway bulletin board. (It's to the right of my door & the tree is to the left of my door.) Like our leaves & owls, this bulletin board will take us through November. (Which is great because my youngest, Gabrielle, is getting married in November & I'm not sure how creative I'm going to be until after the wedding...) The cute little hedgies are made from paper plates ~ I folded them & pre-cut the head/snout before the kids painted them. Once dry, I stapled them along the edges & the kids glued on the paper spines, wiggle eyes, and pompom noses. I've never used glue sponges, and really wished that I had some for this craft. But, in lieu of glue sponges I put some white glue into milk bottle caps. (We have a ton of them on hand because our PTO is saving them to have benches made for our playground. Check out the program HERE.) I figured  using 18 caps for glue wouldn't set back our bench goal too badly. :-)


I asked our kindergarten TA to put some words up for our hedgehog bulletin board ~ I wasn't picky, I just thought we needed it to say something. Well, not only did she come up with a title, she created this fabulous harvesting hedgehog! She is a wonder! She looked at some pictures online & painted it!


Trip to the apple orchard with some of my girls (Gabrielle had to work). Sarah (in last car) is also a kindergarten teacher so she was on Fall Break. Emily, in the front car, is an author and sets her own hours. (Check her out on Facebook.) What a fun activity for a crisp fall day!

 A ride on the Moo Choo is a must!

 A harvest of cuties! My little darling granddaughters in a giant cornucopia.

 Enjoying apple cider on the front porch of the apple orchard's big barn.


Background papers by:


Saturday, August 2, 2014

Back to School BBQ

It's hard to believe that summer is coming to an end.  I had a fun, busy summer, and am sort of, kind of, a little... ready to start thinking about school.  It's always hard to give up lazy days spent relaxing on my front porch, and getting to spend lots of time with my darling granddaughters.  But, the calendar tells me that it's time to get back into school mode ~ ready or not!

But, here's a fun Blog Hop that will make the transition a little easier. 
 

In this blog hop you will find resources and recipes!  I can't wait to see what everyone has to offer.  It is just like a big picnic.


My first offering is a link to my newest product ~ Serving Up CVC Words.  Kinders & Firsties can always use lots of practice with CVC words, so in the spirit of this hop I created a fun food themed set of activities.  There are four different activities, each with differentiated worksheets for additional practice.  Want to try it for FREE?  Click HERE for a sample.


And, now for the food!  We try to eat yummy, healthy foods (we eat lots of fruit, veggies & salad), and I like to find new items to add to our list of yumminess.  I found this recipe for Quinoa & Rice Bites on Pinterest & we LOVE it!  I've actually made it twice in the past ten days.  (See pin HERE.)  The first time I made them I used a regular size muffin pan.  When I made them this week I used a mini muffin pan.  I liked them better small because they were crispier.  These would make a great alternative to tator tots.  Quinoa is has lots of protein & is very filling.  Little tots lovers would have fun dunking them into ketchup or their favorite dip.  I think leftovers would be good in my lunchbox with hummus.  YUM!
 

My delicious dinner ~ Free Range chicken (raised by next door neighbor 4-H member), roasted eggplant, zucchini, and candy onions from the farmers' market, blueberries picked at a local farm, and
Quinoa & Rice Bites.  I was soooo excited to eat this meal!  (Yes, it was delicious!)


Fresh veggies from the Farmers' Market & fresh basil from my herb garden.
 

INGREDIENTS

  • 1/2 cup quinoa
  • 1/2 cup black rice (I used a mix of rice)
  • Cooking spray, for the muffin pan
  • 2 large eggs
  • 1 cup finely chopped Vidalia onions
  • 1 cup dairy-free shredded mozzarella cheese (I used real cheese)
  • 3 cloves garlic, minced
  • 1/2 cup fresh basil, chopped finely
  • 1/3 cup grape tomatoes, diced
  • 1/2 teaspoon sea salt
  • 1/2 teaspoon freshly ground pepper
  • 1 teaspoon chili powder
  • 2 chives, chopped finely, for garnish
  • 2 cups homemade tomato sauce, for serving* (We ate ours without sauce)
DIRECTIONS

Preheat the oven to 350 degrees.
Cook the quinoa and rice according to package directions. Coat a muffin pan with cooking spray.
In a large bowl, combine the cooked quinoa and rice with the remaining ingredients, except the chives and pasta sauce, and mix well to combine. Transfer the quinoa and rice mixture to the muffin pan. Using a tablespoon, fill each muffin cup to the top, then using a spatula, press down on the mixture to create a flat surface.
Bake until golden brown, for 20 minutes. Remove from the oven and set aside to cool for 15 minutes. Using a teaspoon, gently remove the rice and quinoa snacks from the muffin cups. Transfer to a serving platter, garnish with the chives, and serve with the tomato sauce on the side.
 
Button 
 
Now, hop over to Kelly and Kim's Kindergarten Kreations to see what's cooking!
Related Posts Plugin for WordPress, Blogger...